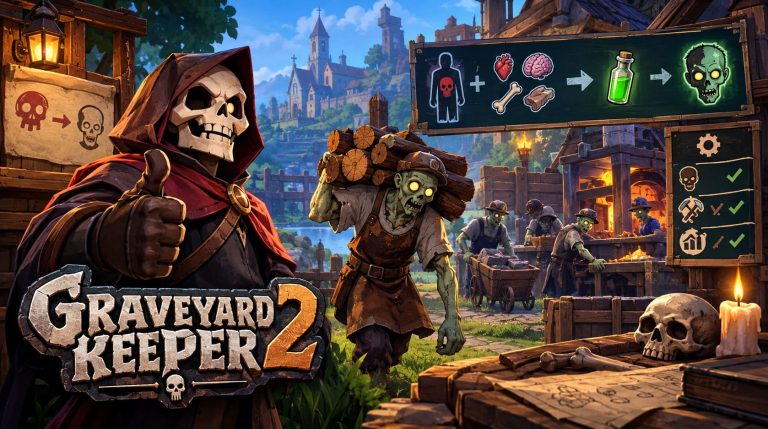
Graveyard Keeper 2 Zombies Guide: Roles, Cap & Automation Secrets
I’ve sunk way too many hours into the first Graveyard Keeper, so when Lazy Bear Games and tinyBuild announced Graveyard Keeper 2, I went in expecting more of the same dark-comedy corpse management I already loved. Instead I got smacked with an entirely new undead labor system called Zombie 2.0, and honestly? It’s the best kind of overhaul — the kind that makes you throw out everything you thought you knew and start theorycrafting from scratch.
You’re not just a small-town gravedigger anymore. You’re the Grand Inquisitor, running an entire medieval settlement, holding off an actual zombie outbreak, and — if you play it right — turning a pile of reanimated corpses into a genuinely profitable labor force. Below is everything I’ve pieced together from early gameplay runs, forum digging, and dev logs, so you don’t have to waste hours on trial and error like I did.
Graveyard Keeper 2 Undead Guide: Ultimate Zombie Management, Combat, and Base Upgrades
Getting Your First Zombies Way Earlier Than You’d Expect
If you remember the original game, you’ll recall zombies were basically a mid-game reward locked behind a long chain of quests with Snake and Gunter. That’s gone. Graveyard Keeper 2 hands you an undead crew almost right out of the gate.
The path there runs through the early main story: track down the Alchemist (players are already calling him the Plague Doctor) in his tower, and an NPC named Larry walks you through setting up your first lab. Along the way you’ll loot a chest with 30 Science points and roughly 15 Alchemy flasks, research a blood sample plus something as basic as a wooden stick to unlock a green rune, then craft Dream Dust at the lab bench (1 Blood + 1 Stick). Finish the Plague Doctor’s tasks and you’ll typically walk away with up to five zombies, ready to work, before you’ve even scratched the surface of the campaign.

Red Skulls Flipped the Script Completely
Here’s the part that’s going to trip up every veteran player, myself included. In the first game, red skulls were the enemy — you spent hours embalming and cleaning corpses to chase pure white skulls. In the sequel, that logic only applies half the time.
| Skull Type | Best Used For | Effect |
|---|---|---|
| White Skulls | Graveyard burial plots | Raises church/graveyard rating |
| Red Skulls | Zombie workers | Increases perk capacity and specialization potential |
So what’s actually going on:
- Graveyard quality still wants white skulls. Bury clean corpses if you care about your church rating.
- Zombie workers want the opposite. The more sin-soaked and red-skulled a body was in life, the bigger its capacity for learning perks after reanimation.
- Perks gate specialization. A zombie with no red skulls can’t pick up unique perks at all, which tanks their ceiling. If you want a late-game min-maxed workforce, you’ll be deliberately curating high-red-skull bodies before turning them into labor.
Basically, save the sinners for the workforce and the saints for the cemetery.
Work Mastery: Why Your Zombie Just Stands There Doing Nothing
I lost a solid twenty minutes assuming a fresh zombie would just start chopping wood the moment I dropped it at a station. It won’t. Every zombie spawns with zero Work Mastery, and without it they’ll stand at their post like a very confused corpse, refusing to touch the crafting queue.
The fix is tools — specifically, the right tools:
- Rusty tools give only +1 Work Mastery. Cheap, fine for early game, but your zombie caps out fast.
- Bronze-tier tools or better give +2 Work Mastery or more, and are basically mandatory if you want zombies handling anything beyond the most basic materials.
Two things to watch for here. First, tool type has to match the station — handing a zombie a hammer won’t get logs chopped at the sawmill no matter how high its general mastery score is. Second, there’s a workaround floating around the community: if you manually kick off a crafting job, an unequipped zombie can finish that single task, but the second the queue empties it goes back to standing there like a lawn ornament. Don’t rely on it — just gear your undead properly.
Assigning Roles Across Your Production Chain
Once your zombies are tooled up and perked out, it’s time to actually put them to work. The map is built around a handful of specialized job types:
- Gatherers (loggers & miners) — Post these at the infinite tree up north or the quarry out east. Equip axes and pickaxes, and prioritize zombies with physical or mining perks for bigger resource yields per cycle.
- Craftsmen — Your central workyard has the Anvil, Joiner’s Bench, Circular Saw, Stone Cutter, and Jeweler’s Table. This is where refined iron, steel bars, and polished stone actually get made, so put your highest-mastery zombies here.
- Porters — Assigned to a Porter or Zombie Supplier Station, these guys don’t care much about crafting tools — what matters is movement speed. Their entire job is hauling crates, logs, and stone back to central storage.
- Farmers — Garden plots, vineyards, and hop fields have all gotten a serious upgrade. Crop yield scales directly with farming mastery, so a dedicated agricultural zombie can keep your winery and brewery fed while also stocking merchant-ready produce.

Wiring It All Into an Automated Network
The real payoff comes when you stop touching resource stacks entirely. That means investing early in the Zombie Logistics node on the tech tree.
Once unlocked, build Logistics boxes next to your storage chests and assign a zombie to manage them. That zombie becomes your warehouse manager — pulling raw materials from storage, loading them into machines (iron ore and firewood into a furnace, for example), then collecting finished goods and putting them back where they belong.
A setup I’d genuinely recommend running:
- Two porters hauling raw wood and stone from your northern camps
- One logistics zombie feeding your furnaces and sawmills
- Two crafting zombies converting materials into finished components
- One porter running trade goods through the tunnels to the merchant gates
Get that loop closed and you can walk away from crafting entirely, freeing yourself up for town politics, combat, and story beats.
Quick Checklist Before You Dive In
- Rush the Alchemist questline early to grab your first five zombies
- Keep clean, white-skull bodies reserved for graveyard burial
- Stockpile corrupted, red-skull-heavy bodies for zombification instead
- Never deploy a zombie without at least bronze-tier tools
- Build Zombie Logistics as soon as it’s available
- Use fast zombies for hauling, high-perk zombies for skilled labor
Balance red skull perks, Work Mastery gear, and a tight logistics chain, and Graveyard Keeper 2’s undead economy stops being confusing and starts being genuinely satisfying to optimize. Get out there, Grand Inquisitor — your zombies aren’t going to manage themselves. Well, actually, once you set them up right, they kind of will.